Welcome to Mozambique Art Day Tour. Get yourself ready for a journey of discovery of Mozambican art in Maputo. You will experience to make your own Batik and your own piece of Arame, and you will take both of them home :-). A taste of Mozambique and some of its Arts in an intense morning.
Departure & Return Location
Cowork Lab 4 (Mussiro’s Office)
Departure Time
8:30 AM
Price Includes
Price Excludes
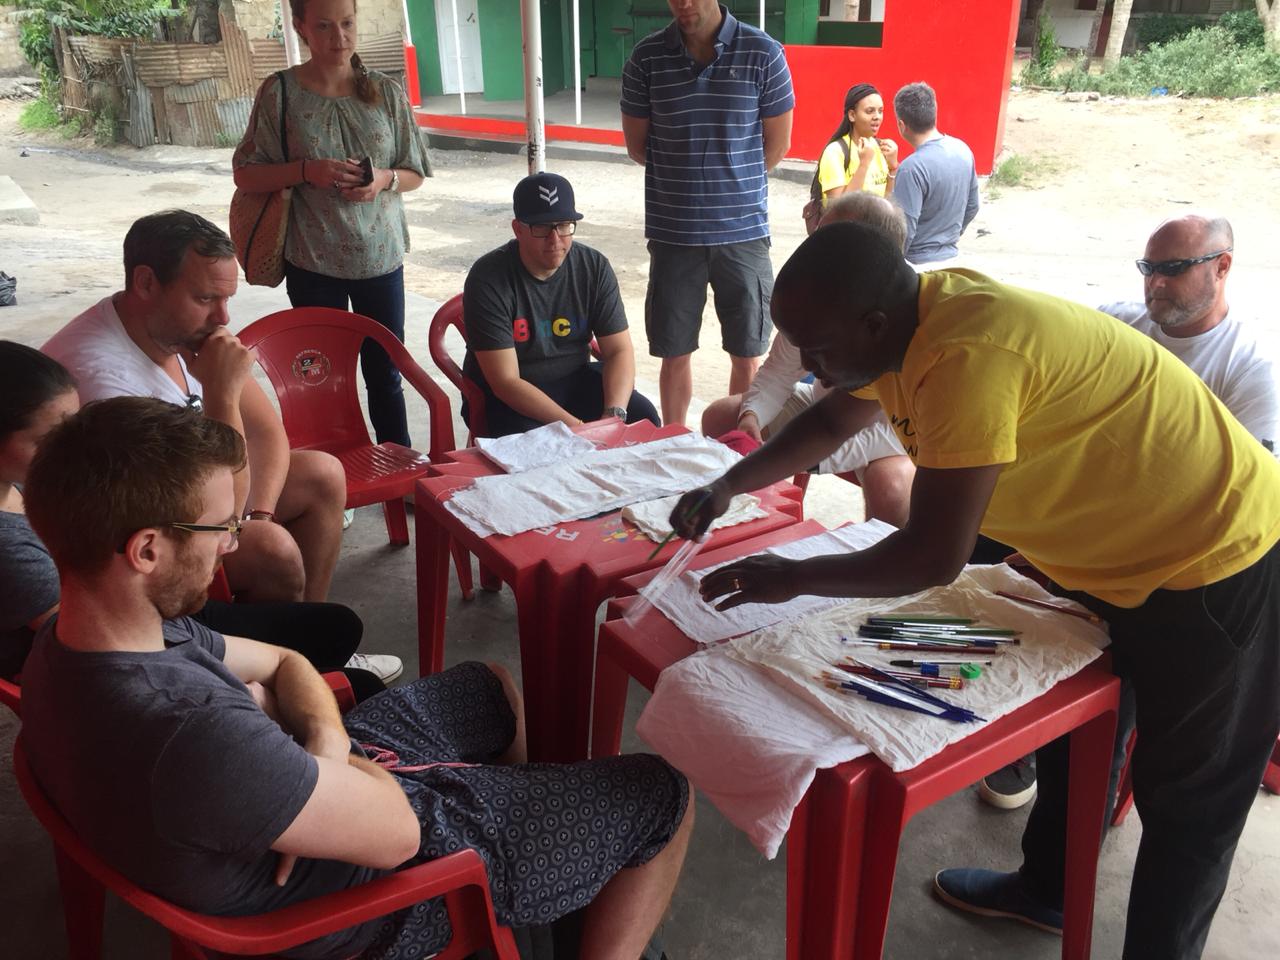
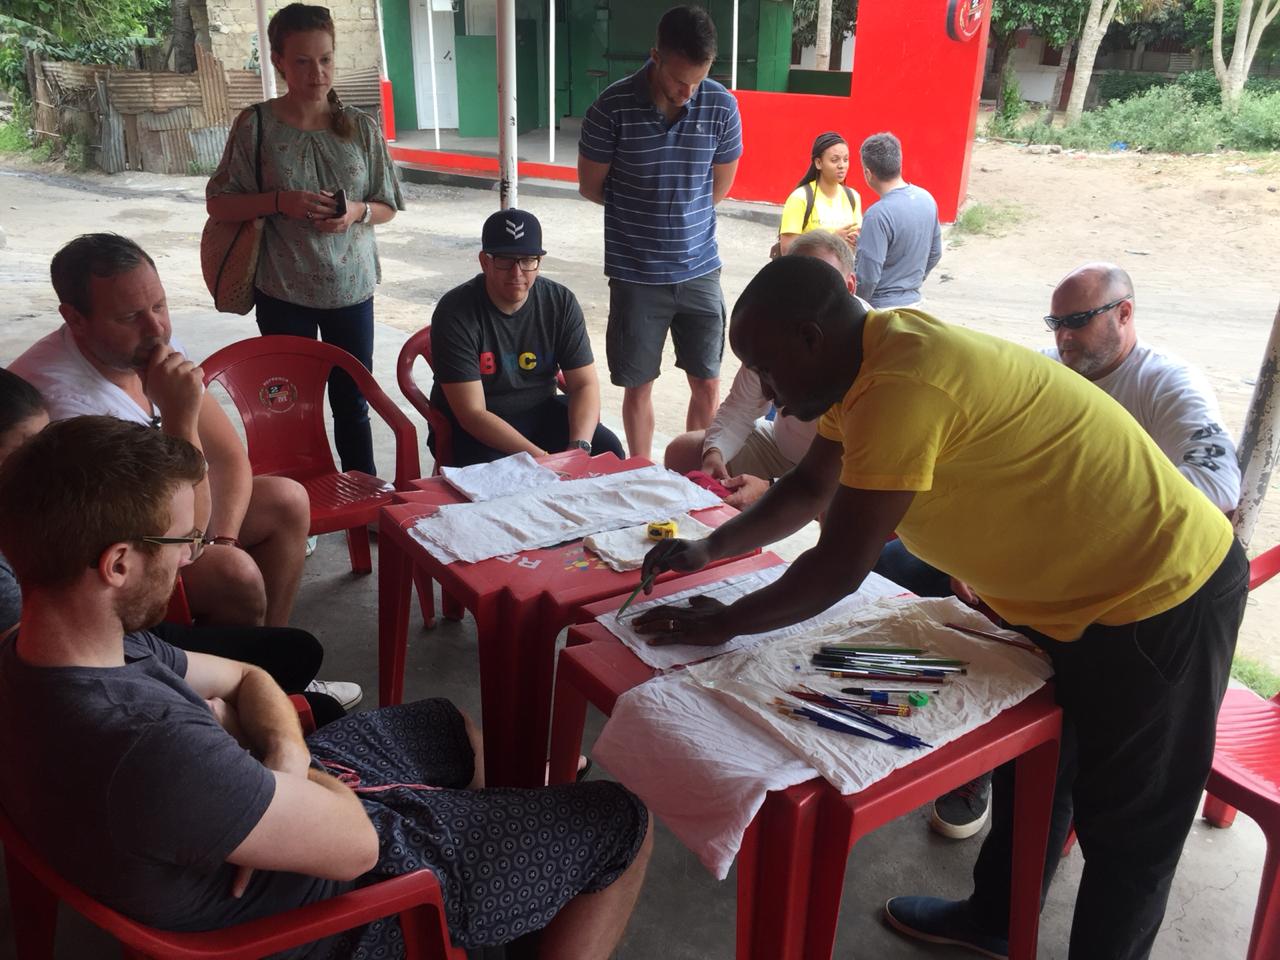
We receive the guests at 8:30 am at CoWork Lab 4.
Batik Workshop (8:30 to 10:00)
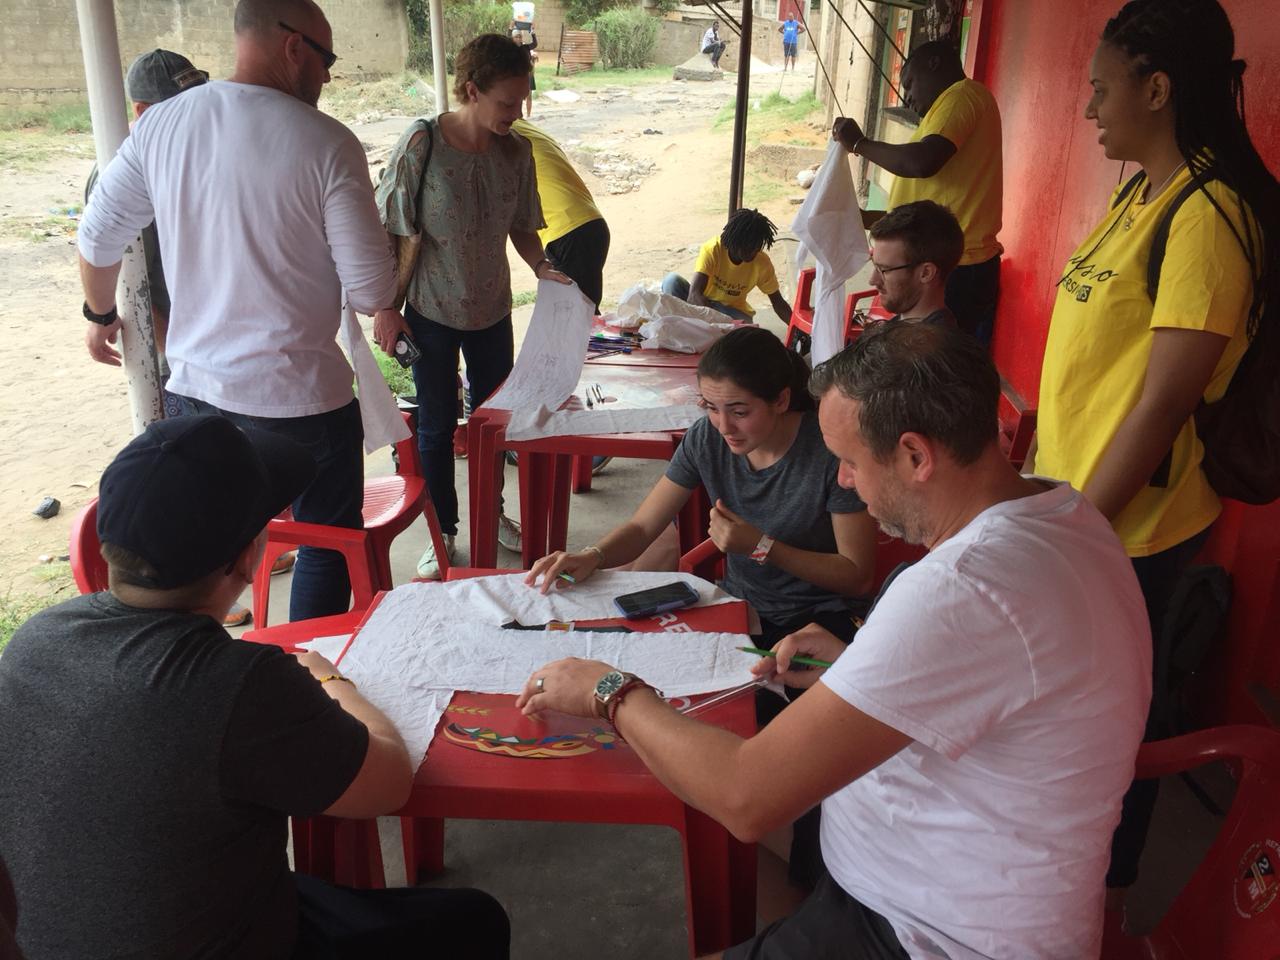
Our two batik masters Matola and Sergio will lead us through the first workshop session. All our guests will have a chance to design, create and make their own batik under the guidance of the batik masters.
When its all done and we have the final product, you can take your own batik home as a souvenir.
We will then have a 10 mins break so that people can refresh.
Arame workshop (10:10 to 11:30)
This session will be lead by Jose also know as Nyash, In the artistic community. This session will also last close to 1 hour and a half and detail by detail our guests will learn how it is done from the arame guru himself. Again remember to take your piece of art home when you are done.
Would you like to learn more about our local art in Maputo-Mozambique whilst you practice, putting your hands on the mass and create your own artifacts? Come and participate in Mozart tour with Mussiro trip in Maputo. Come and make your own Batik and your own Arame and feel the experience; what you do is your souvenir as a present from Mozambique.
We meet at our office (Cowork Lab 4) at 08:30 in the morning or any time that suites you. The whole session will take us at least up to 4 hours. From our office we will take you to the famous art market FEIMA where we run our Batik sessions. Our guide will accompany you, and the sessions are run by our batik masters, so don’t worry, you are in good hands.
Did you know that the benefits of art are promoting innovation and creativity by stimulating your brain? Art is involved in moving the hands and fingers, so it improves the communication among the system of your body.
In order to decide or design a Batik or Arame you need to be creative. It boosts your self-esteem, improves your hand and eye coordination, encourages self-expression, helps in socializing, helps the developing of decision making skills and you will laugh a lot!
We provide you with all the necessary materials for the workshop and as session takes place in FEIMA art market, you may also choose to have a drink or cocktails during the experience in one of the few restaurants and bars, or you can even have lunch after the session or something to eat, maybe a local dish?
Our Mozart is divided into 2 workshops, namely, Batik workshop and Arame workshop, the first session will take 2 hours and the second one 2 more hours.
Our Batik masters have their own art shop in FEIMA so feel free to go and check their works; we are sure you will find something you like and prices are always negotiable. This is the right place to acquire presents for your friends and family, and you will support the artisans at the same time.
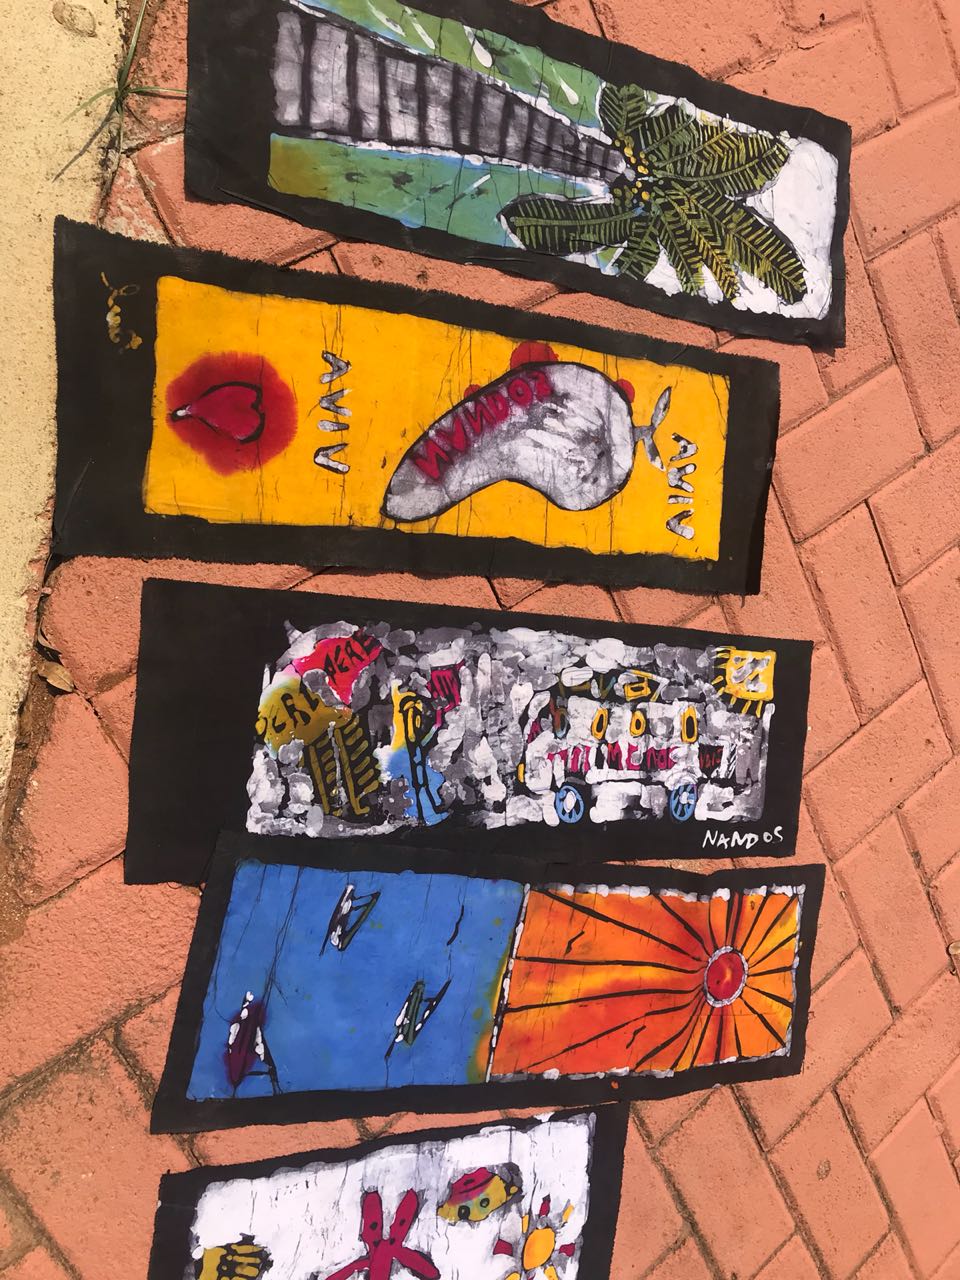
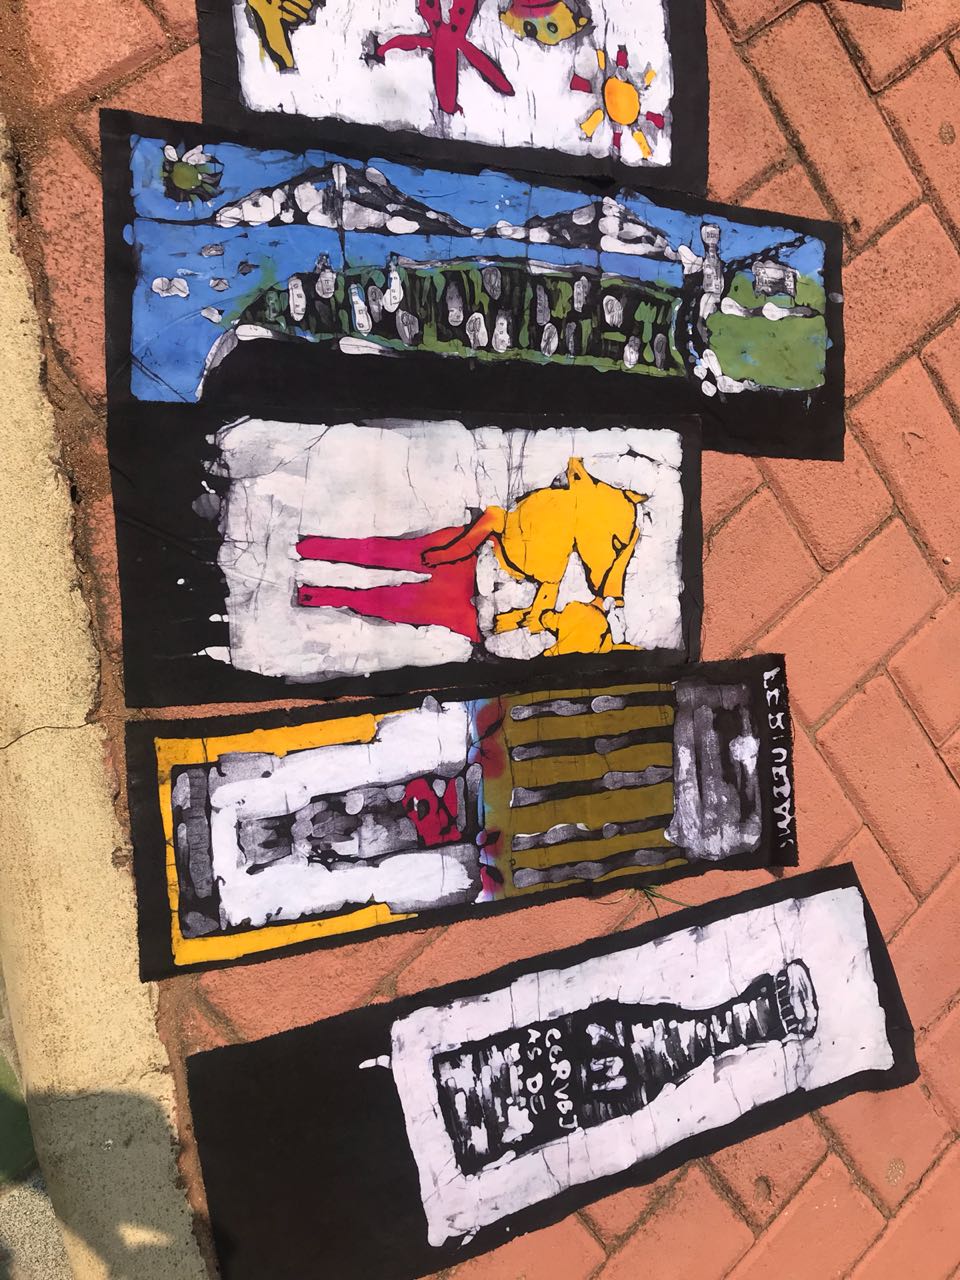
Mozambican Batiks are very popular. The original paintings stand for a popular art form and it expresses the daily lives and Mozambique culture in form of breathtaking colours.
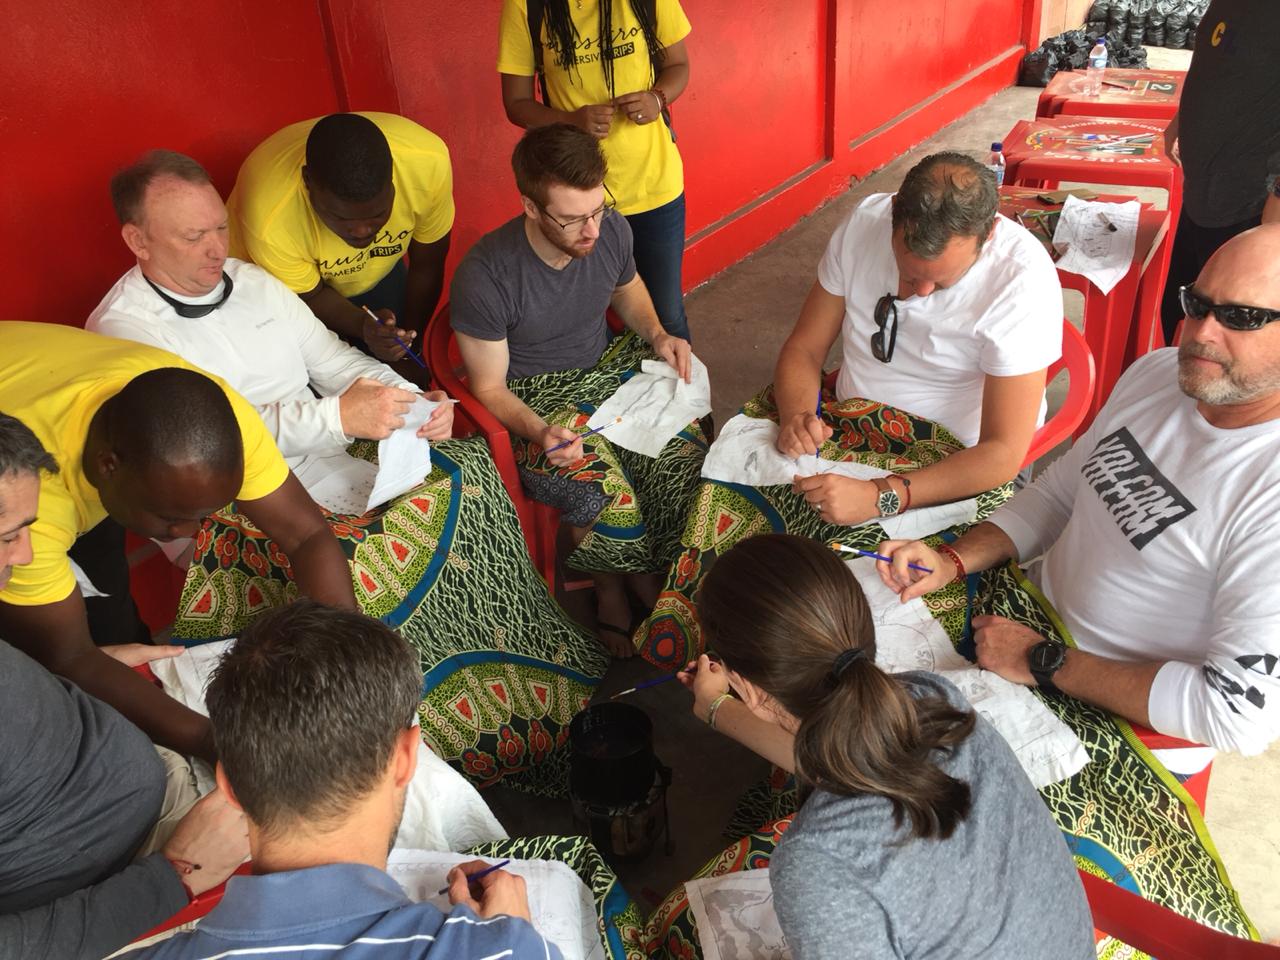
Are you ready for this? Let’s go for it! We will set up tables and chairs for you, but you can choose what makes you feel comfortable. Once ready, we will give you a piece of white cloth, ruler, pencil, rubber, black pen, painting brush and different paints. Then you choose of any design you want to paint, from wildlife animals, people, houses, all the experience you had in Mozambique… If you are not sure our Batik masters is here to help and give you the guidelines of how starting, as they will give you a brief and follow up steps.
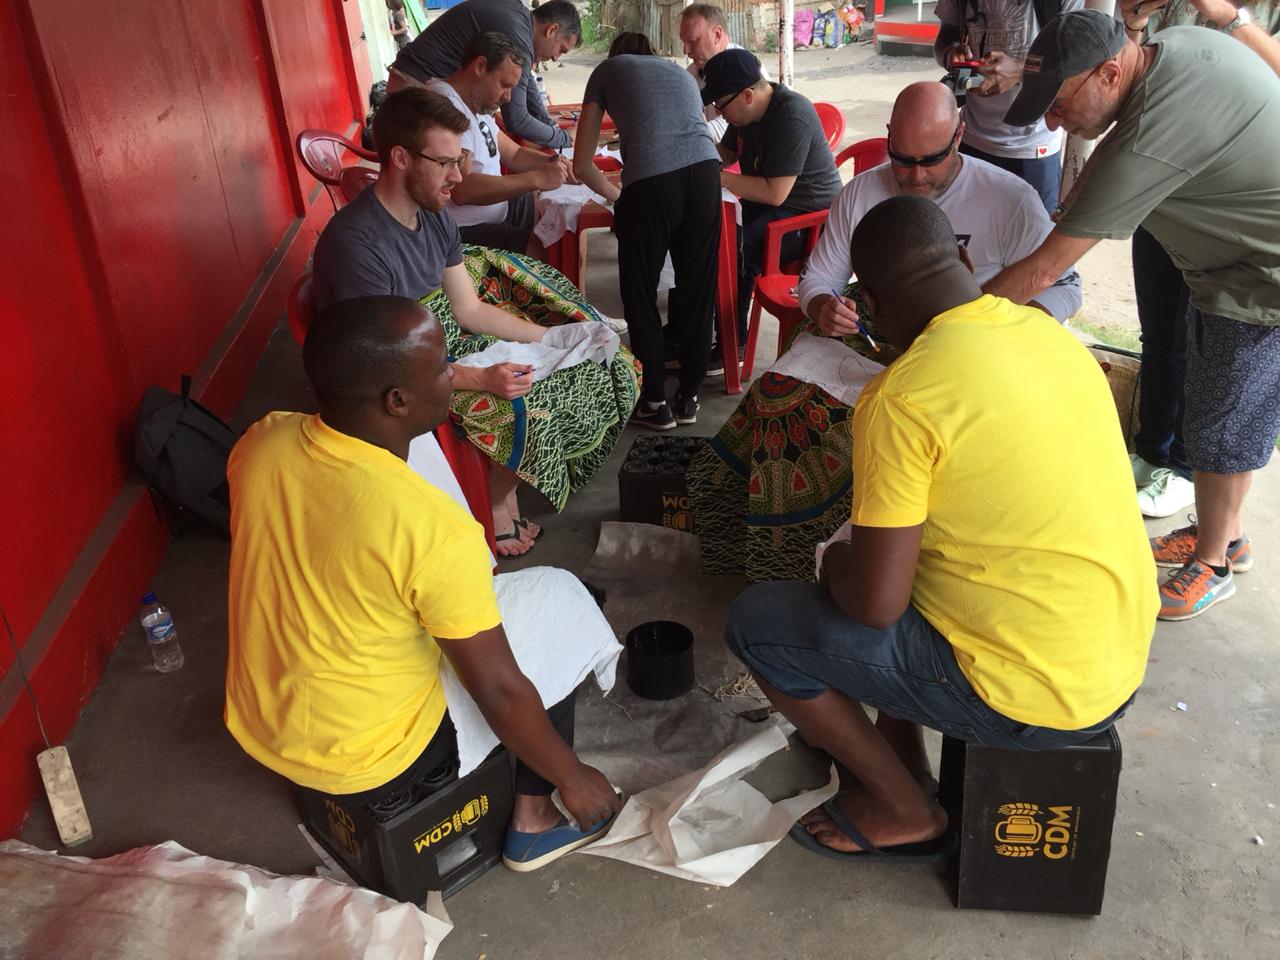
Using the pencil on the white cloth provided, you start drawing your design of your choice; you can use the ruler if you need. We use as a rough draft so that when you made a mistake or you feel to erase, using the rubber is easy to erase; when you are quite sure the drawing is good enough, you then re-do it again using a black pen. The paintings are produced by brushing molten wax onto a piece of cloth, the wax is used whilst it is hot so that it does dry, so we will put a hot pot of wax on a charcoal stove, then you use it from the stove; mind you the wax will be very hot so you need to use another cloth or 2 so that the wax doesn’t go on your skin. You will use the wax to paint on the spot where no specific paint is needed. After finishing with the wax, you will then use paint to paint the different parts you want to. 😀
Again if you have any queries our masters and guide will be there to help you. You can use as many different colours as you want. After done with colouring on the painting, we then put them out to dry,
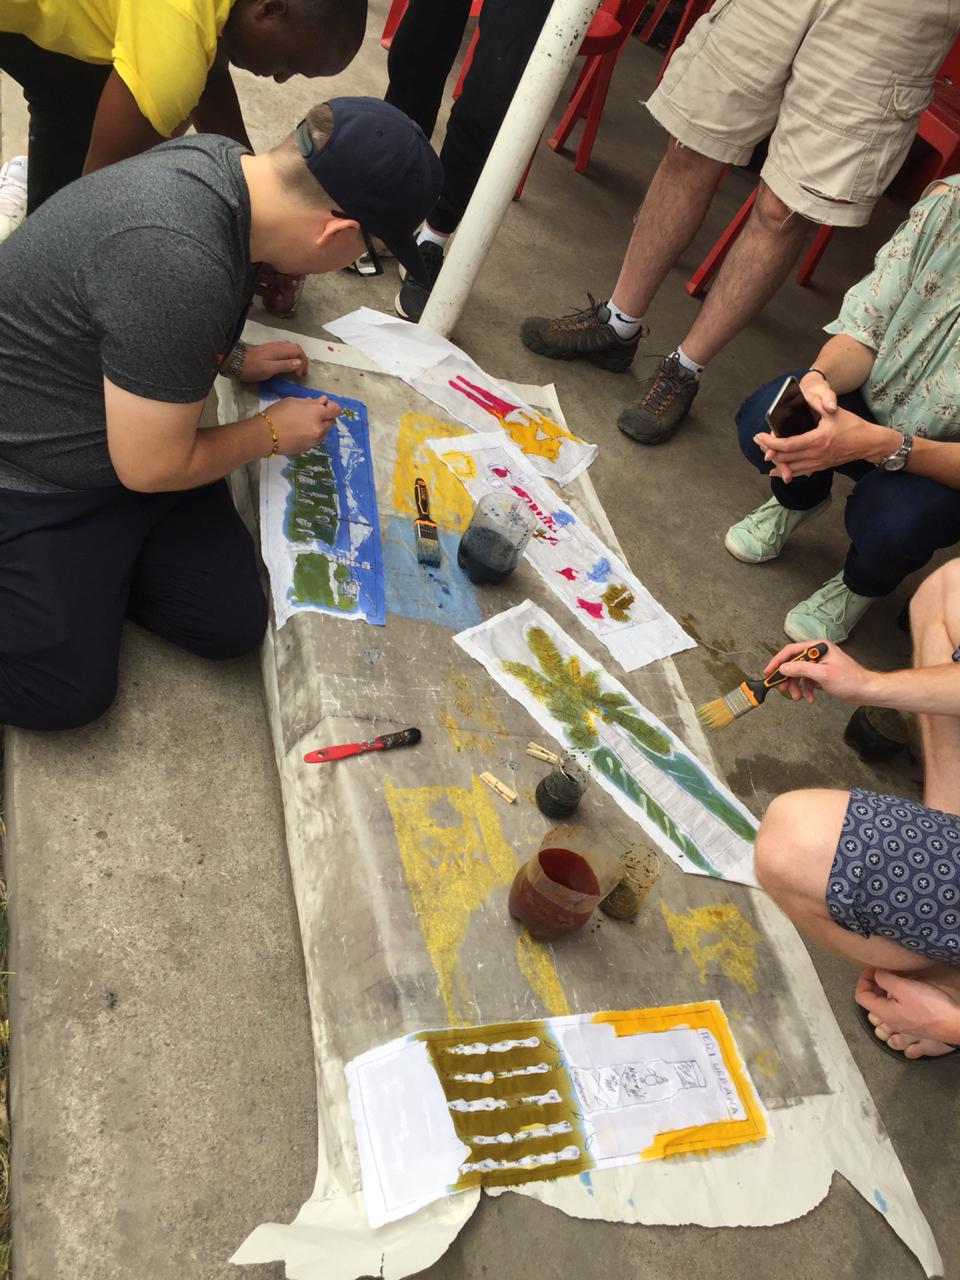
Whilst you wait for your painting, you can have a drink, eat something or visit all the shops around. It will take 30 to 40 minutes for the Batik to dry, then this is the last part of it: we take it out after it dries up and start taking up the dry wax by rubbing the cloth.
After a short break, we will come to the second part of our workshop, which is the Arame workshop. This one will take more or less 2 hours as well, you will be given a piece of wire which we call Arame in Portuguese, and you can learn and show us your skills: from your imagination you will design anything, maybe an animal, key holder or a car, just to name a few. This session is very important as it helps to open your mind, and show how creative one person can be. The Arame is very soft and easy to bend according to your design. Arame can be twisted, tied or wrapped or wound around other wires or even woven into a loose or tight mesh, so it is to work on.
The Arame can be used to design a small art to a very huge art as large as an elephant. After you design your art you can add on decorate using missangas. Missanga is a Portuguese word meaning bead, so bead is a small decorative object endowed with a central hole through which is attached to a thread or wire forming accessories or such as when designing or doing a finishing in art. Arame (Wire) workshops are very attractive to children because it gives them the opportunity to think with their hands, and it is something they enjoy, hence it introduces the concept of line and space for kids. And, of course, missangas are super colorful!
After the workshop, you will have your own Batik and your own Arame that you can take home and show friends and family your new skills. 😀
We must begin by saying that batik is synonymy of art where the person is inspired to make drawings on the fabrics. It is a technique originating from the Island of Java, in Indonesia. For them, batik is not only a social and festive practice, it is also a ritual and oral expression practice.
Which material do we need to make a batik? Fabric, pencil, ruler, rubber, candle, barbecue, charcoal, dye and brush.
The fabric is the fundamental piece for the production of the batik, it is on the fabric that you make the design. We use the pencil for the drawing itself; when sharper the better the drawing. Ruler is used to make squadron, and if the drawing consists, for example, of a temple you will take the measurements of the plan with the ruler. Eraser is to pay for the flaws in your drawing, that gives you the best chance of your drawing coming out perfect. Eraser is to erase the errors in your drawing, which gives you a better chance for your drawing coming out perfect. Candle is used if the candle is melted and still hot to wet the areas to be painted on the fabric. The melted and still hot candle is used to wet the areas to be painted on the fabric. The barbecue and charcoal are for lighting the fire and boiling the candle, but if you want you can use firewood or even an electric stove. Coloring is to make the colors you will need to paint your drawing: you can make blue, brown, green, red, gray, yellow, orange, pink, purple, etc.
How to Make a Batik
To make a Batik, spread the white fabric in a flat area, but first you must cut the measurement of the fabric you will need for your design. For small batiks the ideal is 25 centimeters wide and 35 centimeters long. The pencil and the ruler are used to make the squadron on the fabric, then use the pencil for drawing in the middle of the squadron. This drawing should be your inspiration: maybe animals such as elephant, zebra, impala, lion, crocodile, snake, dog, cat, chicken…, all of them very typical in Mozambican culture; but you can also draw landscapes or whatever you want.
While drawing you have to put the candle in a small pan and leave it on the fire until it melts; it must be at a temperature of 100 degrees for the candle to boil. After a good boil, remove the pan from the fire to the floor so that the candle does not finish, and once the drawing is finished, dip the brush in the boiled water of the candle – note that the water in the candle must be very hot! Dip the brush in the hot water of the candle and paint the inside of your draft/drawing – take care not to wet the lines of the drawing! After wetting the interior, let it dry. Meanwhile mix the colors you need; if you are going to need many colors we advise you to use as many cans (containers) as the number of colors you need, that is, if you want to paint with three colors, use three cans, as this prevents the unwanted color from coming out due to mixtures. When finished painting, take the batik to the clothesline: if the sun is not too intense, leave it on the clothesline for an hour, but if it is too intense, leave it for thirty minutes. After that time on the clothesline take out your batik for ironing.
How to iron?
Place an intermediate cloth on your ironing table between the iron and the batik itself. After that, the batik is ready. You can now take your feelings on a fabric to hang in your home. 😀
Wire crafts are not disclosed, but you can find pieces made with wires in the decoration stores, so it is a good idea to learn how to make decorative wire pieces by yourself. 😀
The wires can be made in copper, aluminum, galvanized, steel or even opaque wire.
The copper is a very special material and used a lot by artisans who do their work to sell outdoor. With this wire you can make beautiful earrings, necklaces, rings, bracelets and some miniatures too.
With aluminum wires you can make keyrings, door effects, letters with your name, animal models, lamps, car models, house models, trees, boats, airplanes, among others. And you can make a brilliant work of art, and not only brilliant in the sense of creation, but in the sense of a natural shine of the material itself.
To make these objects out of wires, patience is needed to develop well-balanced and beautiful spirals.
What material do I need?
You will need wire, scissors, pliers, wire terminal and your own thread to thread missangas.
* The best threads for missangas are flexible ones.
* All of these materials are easily found at a craft store.
Imagine your object
When considering the object to be made, consider the size factor: if you want a small animal you can make Maria-Café (a centipede), which is very easy to make, and note that the final size of your animal or object made with wires includes the amount of missangas used to give effect or color to your mold. Then look for a container, like a bow, and pour the missangas inside to make it easier to thread them. After putting the missangas through the thread, decorate your animal.
Ideas of what to do with wire objects
You can make a keyring in the shape of a fish or something else in small sizes able to take in your pocket; you can also make a small elephant, for example, and put it in the zip of a bag – it’s very cute. You can write your name with wires and decorate with missangas and put it on your bedroom wall. Or something different like a lamp and put on the headboard of your bed or in the office.
Using the wire you can make a globe of light and decorate with blue missangas and put a fluorescent bulb that brings a different scenario. These globes can be set in the bedroom, in the living room or in the office.
At Christmas time you can wire a Christmas tree and decorate it with missangas and lights as well, and don’t forget that any size is possible. You can do as much as your imagination allows.
Creativity is a constantly applicable word when it comes to producing handicrafts with wires.
Do not hesitate to give us a call or send a message. We are looking forward to help you out ☺
